6 Steps to Beautiful Hardwood Flooring (with Photos)
This post explains how to redo your living room hardwood floors so they look beautiful again!
If your living room’s hardwood floors have seen better days, there’s no need to replace them entirely. Refinishing your hardwood floors can restore their natural beauty and give your living space a fresh look. This DIY project saves you money and allows you to customize your hardwood floors to match your interior design preferences.

In this guide, I’ll explain the steps to restoring your hardwood floors and explore some of the best hardwood flooring ideas for your living room.
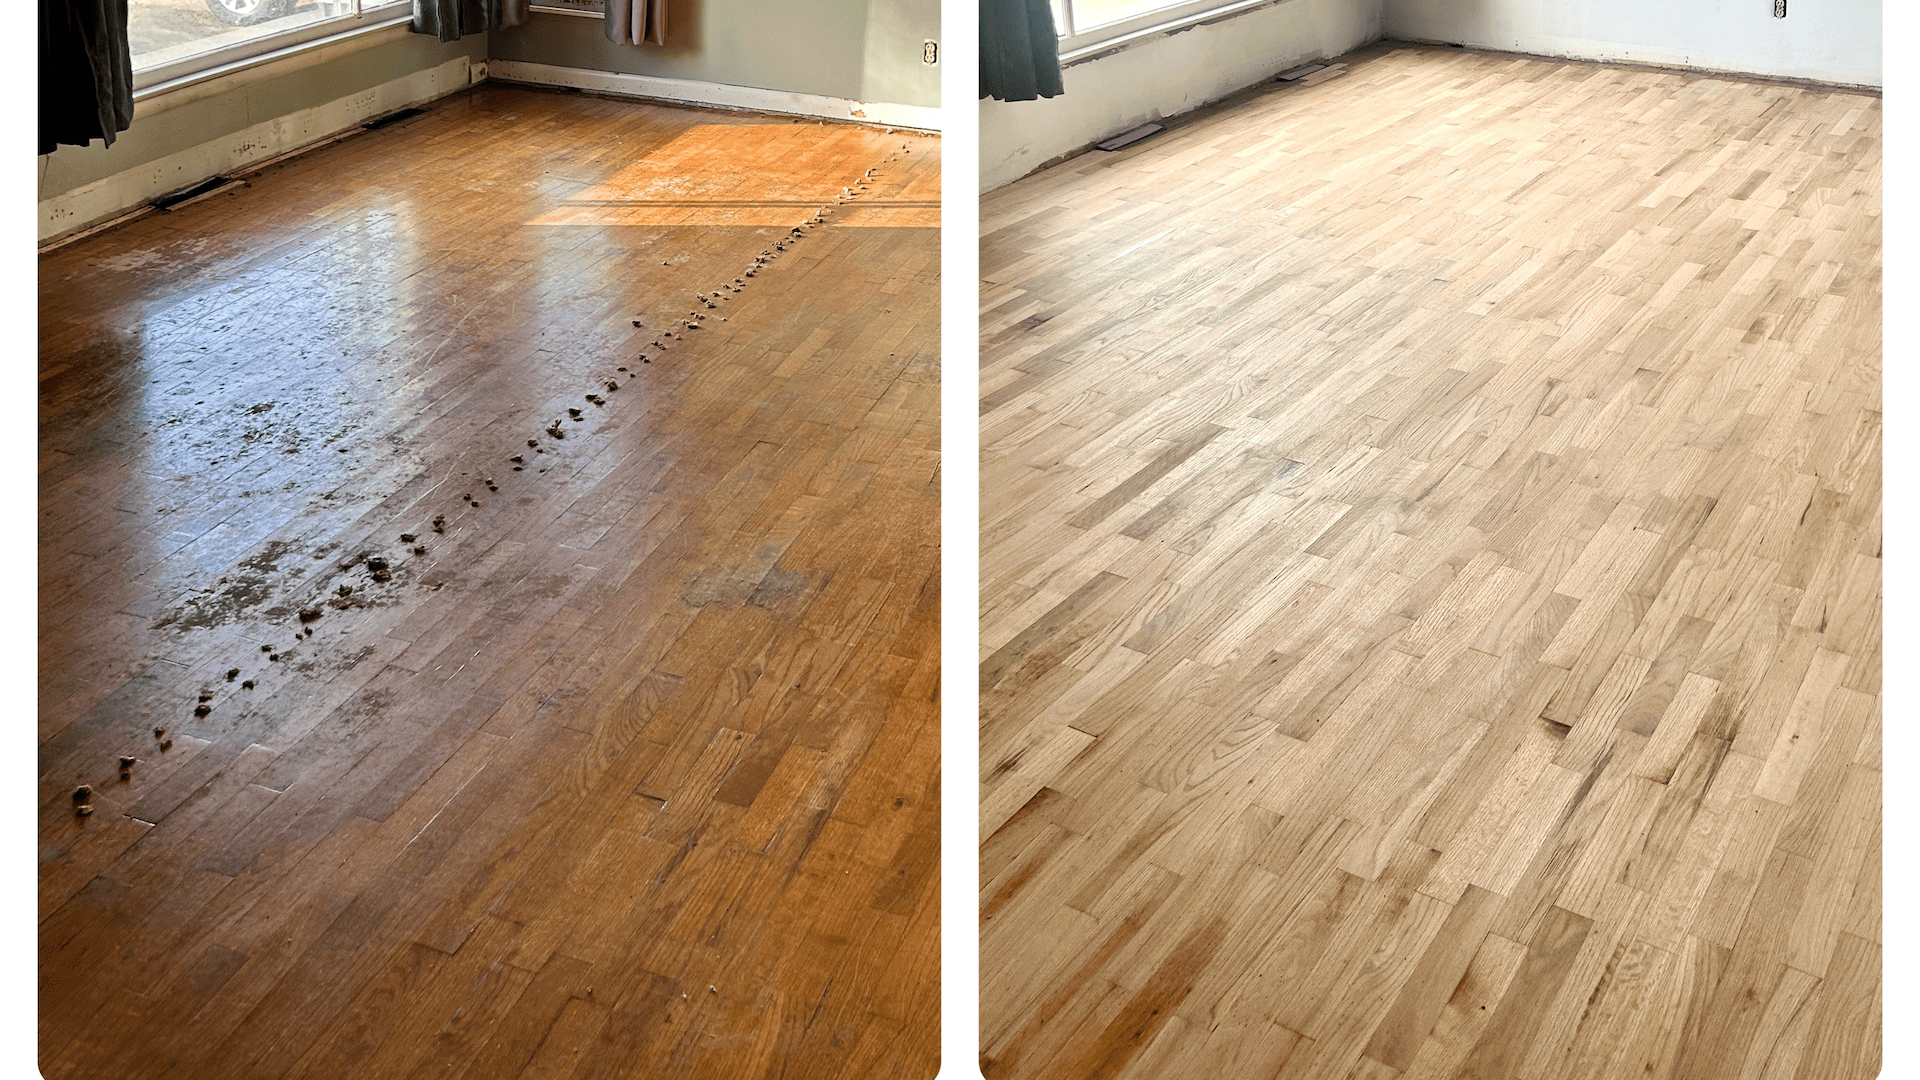
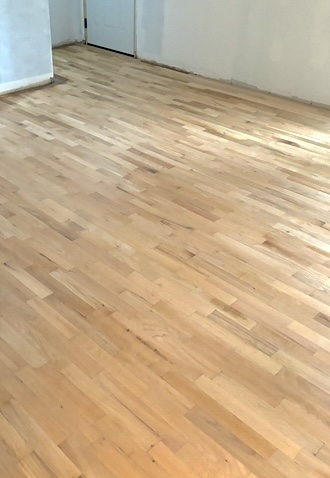
If you want to make your orange-looking red oak hardwood floors look light and modern, try Bona Red Out. I am so pleased with how my floors turned out! They went from looking like red oak floors to white oak floors!
Why Refinish Your Existing Hardwood Flooring?
Refinishing your existing hardwood floors has 5 key benefits:
- Save money: Refinishing is a much more affordable option than replacing your floors, especially if you already have high-quality solid hardwood flooring.
- Maintain the classic look: Solid wood floors are timeless and offer a unique look with a beautiful grain pattern that laminate flooring or ceramic tiles can’t replicate.
- Customization: Refinishing allows you to choose the type of wood finish—whether glossy, matte, or something in between—that matches your desired room feel.
- Increased durability: With proper care, refinished hardwood floors can last for many years, making them an excellent investment in your home’s aesthetic appeal and value.
- Reduce smells: Sanding your hardwood flooring can eliminate any unpleasant odors absorbed by your current hardwood flooring.
Redoing your hardwood floors can give your most used room—your living room—a brand new look and a sense of warmth that will elevate the entire room.
How to Refinish Hardwood Flooring In Your Living Room
Step 1: Evaluate the Condition of Your Hardwood Floors
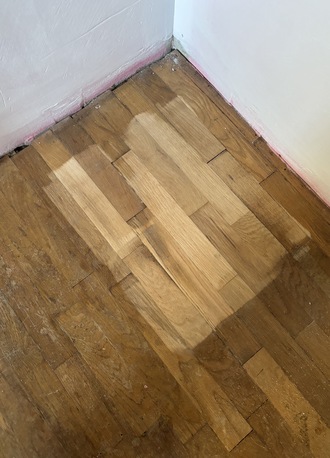
Before you jump into the refinishing process, it’s important to evaluate the condition of your hardwood floors. Here’s what to look for:
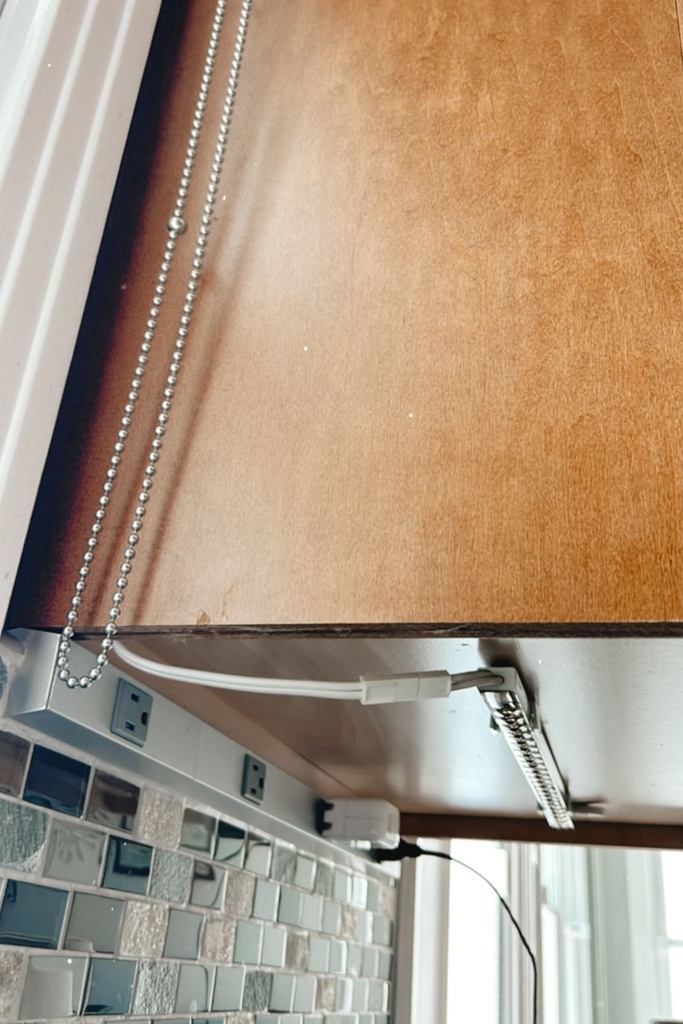
- Staples: After removing the carpet and carpet pad, be sure to pull all the staples out of the floor. Exposed nails or staples could ruin the sanding pad on your sander.
- Surface Damage: Examine your floors for scratches, dents, or stains. Light scratches can usually be buffed out, but more significant damage may require extra sanding.
- Wear Patterns: High-traffic areas, such as walking paths or spots near the coffee table, will show the most wear. These areas might need extra attention.
- Existing Finish: If your floors still have a glossy finish, they might need light buffing. If the finish is worn down, sanding is required to remove the old layers and bring back the natural wood tones.
Understanding the state of your floors will help you determine the best way to refinish them.
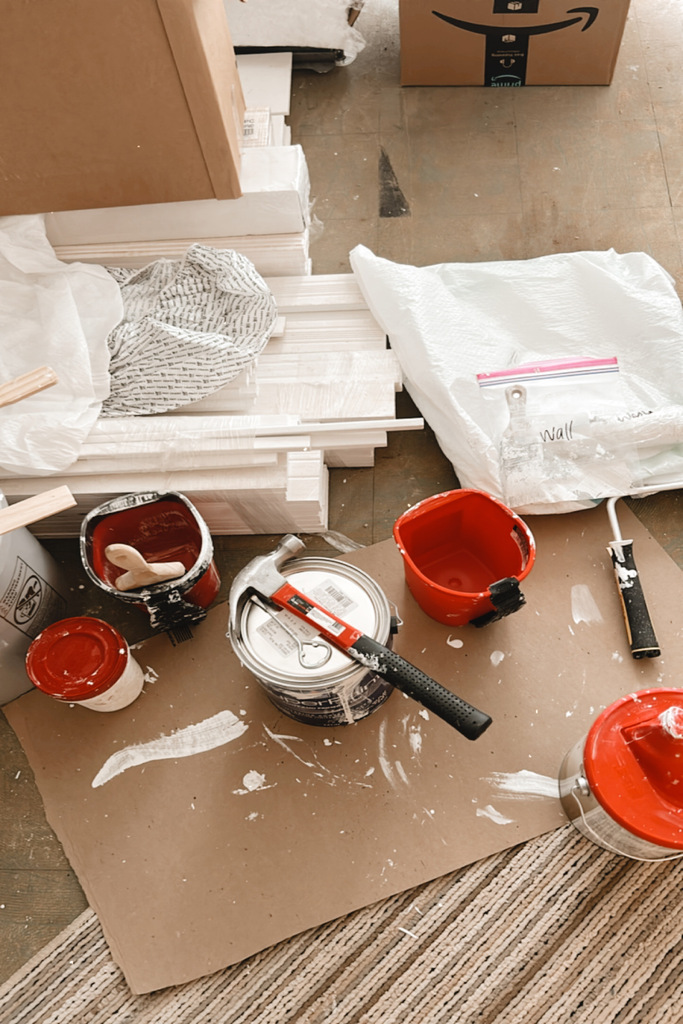
Step 2: Gather Your Tools and Supplies
You’ll need the right tools and supplies to redo your existing hardwood floors. Here’s a list of everything you’ll need for the job:
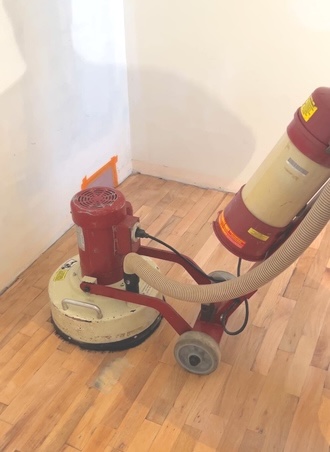
- Sander: A drum sander is ideal for large areas, and an edging sander will be necessary for corners and along walls. Check the drum sander to ensure the pivoting wheel is good, the drum spins evenly, and the collector bag is connected correctly. Another important factor is making sure the switch is intact. These were lessons I learned renting sanders to redo my hardwood floors! A drum sander will suffice if the current flooring is in good shape and newer. If the floor is older or the boards are not even, you’ll want to use an orbital sander instead of a drum sander and follow the same process outlined in Step 4.
- Sandpaper: You’ll need several grits of sandpaper, starting with a coarser grit (around 40) for initial sanding and moving to finer grits (around 100) for a smooth finish.
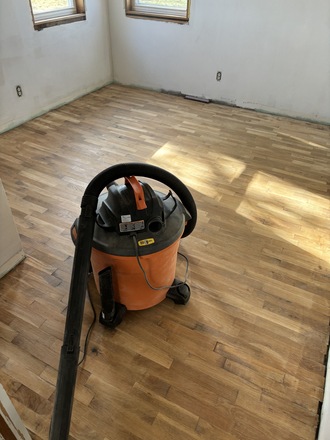
- Vacuum and Mop: Clean the floor thoroughly to remove dirt, dust, and debris before sanding.
- Tack Cloth: Use a tack cloth to remove the fine dust left behind after sanding.
- Brushes or Rollers: To apply the finish evenly. A long pole is extremely helpful.
- Finish or Sealer: Bona is a great choice for refinishing hardwood floors. Depending on the look you want, you can choose between a matte, satin, or glossy finish.
If your existing floors are laminate flooring or ceramic tiles, refinishing will not be an option. However, you could replace them with more durable options like solid hardwood flooring or luxury vinyl tile for an updated look.
Step 3: Prepare Your Living Room
Before you begin sanding and refinishing, you’ll need to clear your living room and protect the surrounding areas:
- Remove Furniture & Vents: Clear out all furniture, including the coffee table, chairs, and other items that could get in the way. Remove vent covers.
- Cover the Walls and Baseboards: Use painter’s tape and plastic to protect walls, baseboards, and door frames from dust and finish splashes.
- Clean the Floor: Sweeping or vacuuming the floor is critical. Dirt or debris on the floor can interfere with sanding and damage the finish.
The cleaner your workspace, the smoother the refinishing process will be and the easier it will be to clean after sanding.
Step 4: Sand the Floors
Sanding is the most labor-intensive part of the refinishing process, but it’s also where the transformation happens. Sanding removes the old finish and evens out the wood’s surface. Be sure to wear ear protection and safety glasses.
Tips for Sanding:
- Sand in the direction of the grain pattern to avoid scratches that could damage the wood.
- Start with a coarse grit (40) and gradually move to a finer grit (100) for a smooth, even finish. For example, complete your drum sanding with 40 grit, then do your edge sanding with 40 grit. Then move to drum sanding with 60 grit and edge sanding with 60 grit. Then, do your 100 grit on both types of sanders.
- Use a drum sander for large areas and an edging sander for areas near the walls. Thoroughly sand floors in high-traffic areas, such as walking paths near the dining room or living area.
- Don’t oversand—you want to smooth out the floor, not remove too much of the wood.
Tips for Using a Drum Sander:
- Before starting the machine, raise the drum with the handle that controls moving the sander up and down.
- As you lower the machine onto the floor, make sure you’re moving forward. You don’t want to turn the sander on while standing in one place, as this could sand off more layers than you desire or result in uneven floors.
- Don’t stop moving; rather, guide the machine forward for your first pass. As you approach the wall, raise the drum and move the sander over so it slightly overlaps your first pass. As you lower the drum, walk backwards for your second pass. Continue this process of back-and-forth until you’re finished sanding the entire room or have sanded about 400 square feet. I found that after about 400 square feet, I needed to replace the sandpaper.
- Go slow and allow time for the machine to do its job.
- Keep an eye on how full the bag is getting. When emptying your dust bag, empty it into a self-contained container to eliminate any combustion. The dust particles have chemicals from the previous stain, and the particles are hot from sanding, making them combustible.
- After sanding, use a vacuum and tack cloth to remove all dust. Any residual dust can affect the adhesion of the new finish.
Step 5: Apply the New Finish
Once you’ve finished sanding, it’s time to apply a new finish to bring out the natural beauty of your wooden floors. A water-based polyurethane is the most popular choice because of its durability, ease of maintenance, and versatility. It’s available in various finishes—from matte to glossy—so you can choose one that aligns with your design preferences.
A matte finish provides a more modern look, while a glossy finish enhances the natural light in your living room and makes the wood tones pop. A satin finish balances the two, giving you the best of both worlds.
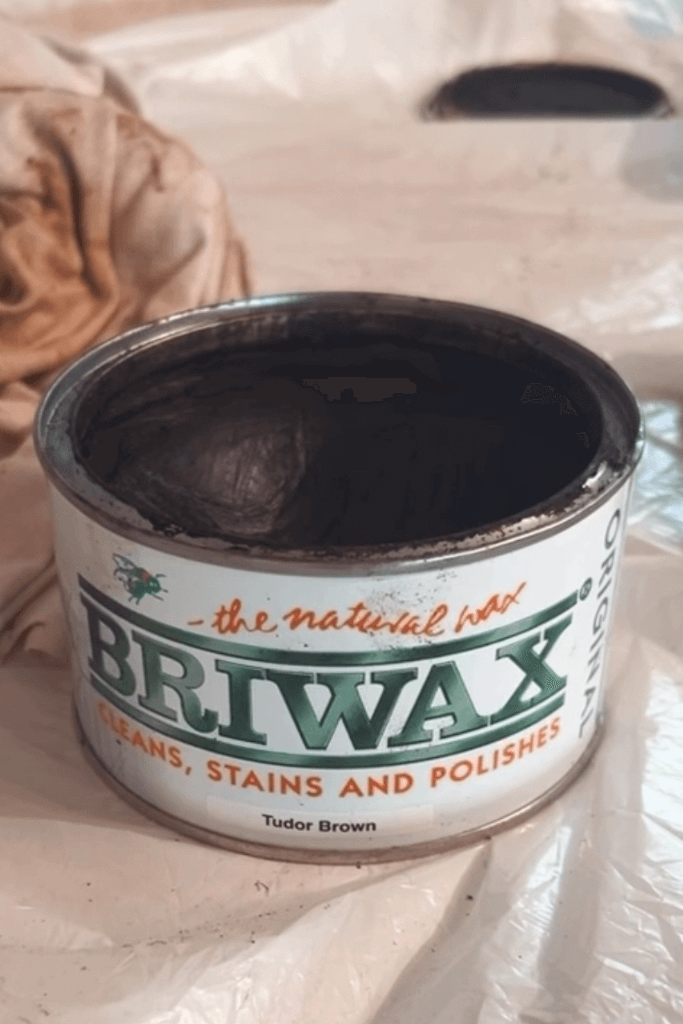
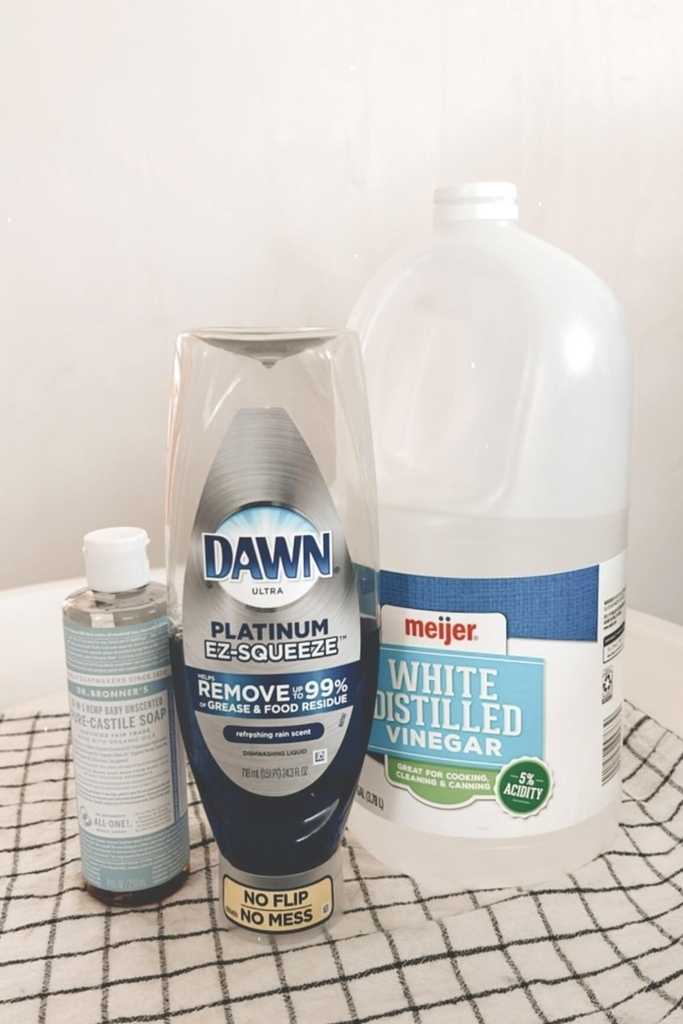
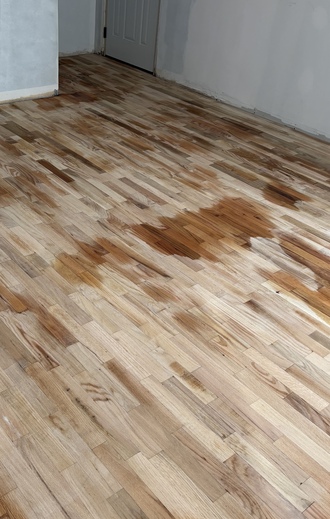
I decided to use Bona products for my refinishing project because I wasn’t thrilled with the orange tint on my floors and wanted light hardwood that looked natural. Bona Red Out caught my eye because it removes those red or pink hues from hardwood. I was surprised by how easy it was to apply—and how well it worked!
For the finish, I went with Bona ClearSeal followed by Bona Mega ONE, both of which were an excellent choice for a more affordable yet high-quality result. If you’re willing to invest a little more, Bona also offers Traffic HD, which provides a more durable, long-lasting finish—especially useful if you have pets. While Traffic HD is pricier, it’s a great option for a tougher, more resilient coating.
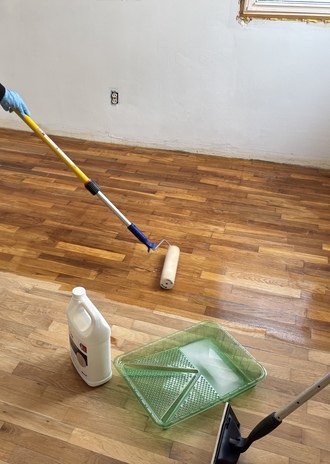
For all application steps, be sure to wear clean socks to avoid getting dust or debris in your floor finish.
How to Apply Bona Red Out:
- Apply Part A with a roller on an extension pole. Apply in sections since the longer the product sits on the floor, the more it removes the red hue.
- Apply Part B over top of Part A using a different roller. You want to make sure that each section sits for an equal amount of time.
- Leave floors to dry for 12 hours and then vacuum any dust particles that may have fallen.
How to Apply Bona ClearSeal and Mega ONE:
- Shake the ClearSeal bottle for 1 minute, remove the cap, and let the bottle sit for 5 minutes to avoid air bubbles.
- Use a brush or roller to apply a thin finish coat, starting at the edges and working toward the center.
- Allow the finish to dry for 2-3 hours.
- Shake the Mega ONE bottle for 1 minute, remove the cap, and let it sit for 5 minutes to avoid air bubbles.
- Use a brush or roller to apply a thin finish coat, starting at the edges and working toward the center.
- Allow the finish to dry for 12 hours.
- Lightly sand before the final coat of Mega ONE with fine-grit sandpaper (220-grit) to remove imperfections or any grain raise.
- Vacuum and use a slightly damp towel to pick up any dust particles.
- Use a brush or roller to apply a thin finish coat, starting at the edges and working toward the center.
- Let dry for at least 12 hours. In 24 hours, the floors will be dry enough to move your furniture into the living room. Don’t lay down any rugs yet since the finish needs time to finish off-gassing. After 5 full days, you can lay down rugs.
Bona products were the best flooring products for my floors because they’re water-based, easy to apply, and gave me a light, modern hardwood look, which I wasn’t sure was possible!
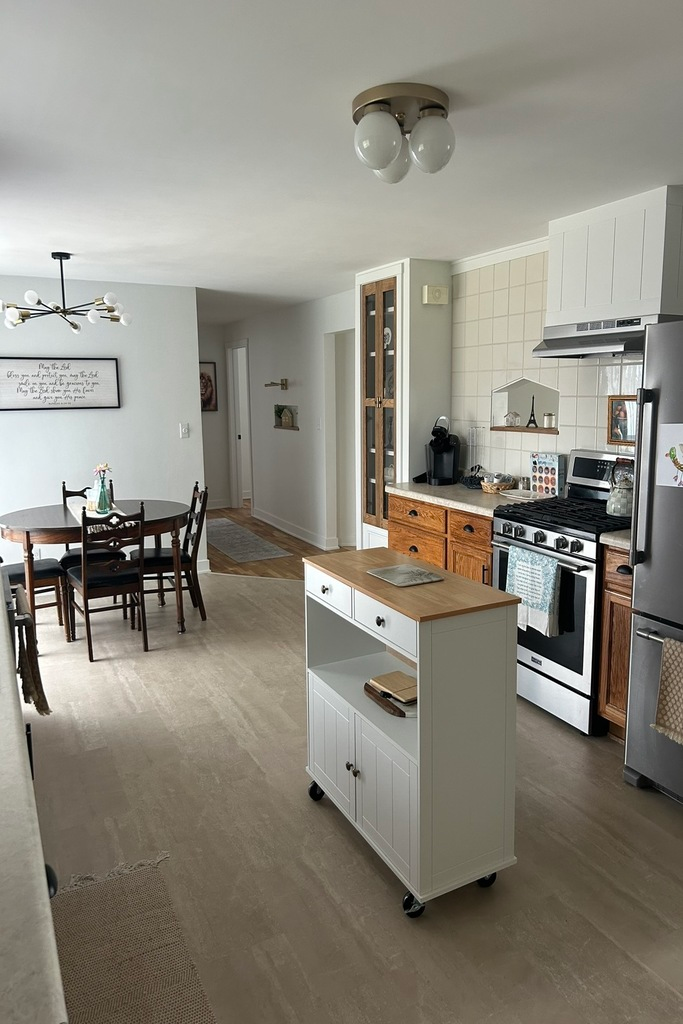
Step 6: Add the Final Touches
Once the new finish has cured (usually 24-48 hours), you can start putting your living room back together:
- Rearrange the Furniture: Place your furniture back in the room, ensuring that the floor is the space’s focal point. If you have wide planks or a unique wood type, highlight them with pieces like a statement coffee table or complementary side tables.
- Incorporate Area Rugs: Area rugs can define walking paths and high-traffic areas, protecting the floor from wear while adding color and texture to the room. If your living room has heavy foot traffic, consider placing rugs in key areas near the coffee table or in front of seating areas.
- Enjoy the New Look: Your refinished hardwood floors should now look as good as new, with a beautiful grain pattern and a fresh finish. Whether you’ve gone with light or dark hardwood, your floor will add a natural warmth to the living room, making it feel like the perfect place to relax and entertain.
Redoing your existing hardwood floors is one of the best hardwood flooring ideas for renovating your living room on a budget. By sanding, refinishing, and adding a fresh finish, you can achieve a new look that complements your personal style and enhances the overall look of your living room.
Consider your design preferences and the overall room feel when choosing the finish, whether you go for a matte finish or a high-gloss shine that reflects natural light. With the right tools, proper care, and a little DIY effort, you can transform your floors into stunning features that become the focal point of your living room.
And if you don’t have solid wood floors, don’t worry! There are many beautiful laminate flooring or luxury vinyl tile options as well. I chose beautiful luxury vinyl tile for my kitchen floors to help highlight the natural wood throughout the rest of my home. It is the perfect choice for my home. I thought about a hardwood look-alike, but it was not the ideal choice since I didn’t want look-alike hardwood flooring to compete with my actual hardwood flooring.

The right flooring will set off your living room, and hardwood floors are one of the very best living room flooring ideas!